Don't throa it away

Gawn Chippin

Arachnocronymic Metaphoron
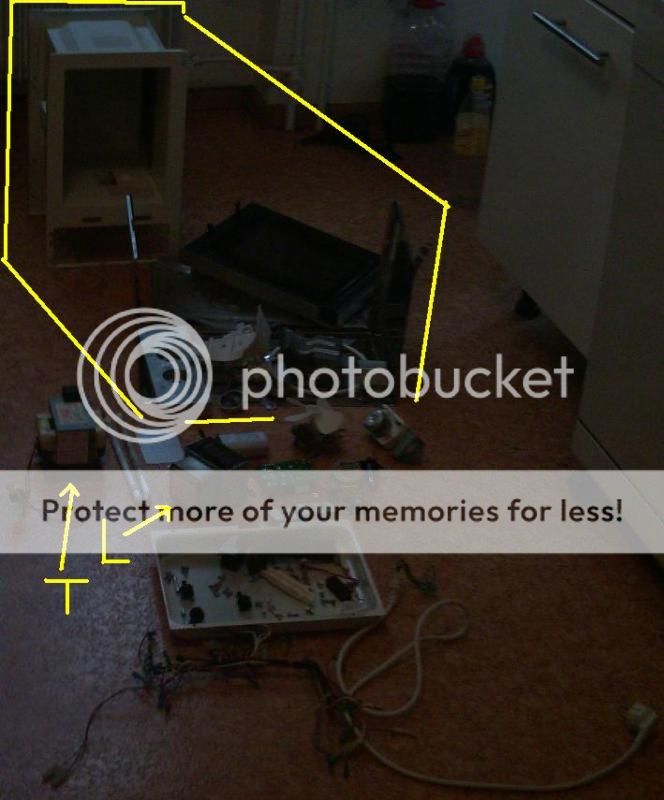
My ex somehow went hammer-handed on an otherwise reputable kitchen appliance originating in East Germany as a copy of a successfull West German brand. She immediately wrote it off, inpulsive as she is to habitually and needlessly shovel out money. So I brought this damaged part home and then hooked up a fixture, using my brake tube vise, a drill trigger and battery alligator clamps harvested from a slipshod battery charger originating from You Know Wherestan.
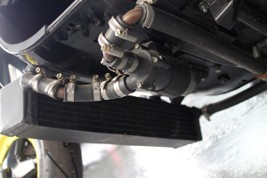
The idea was to hook it up to where it would spot weld. At first, I released the trigger and pulled it as quick as possible, expecting fireworks. Instead, it took a few seconds, to casually sizzle together. Surprisingly, the trigger mechanism built up a consideral amount of heat.
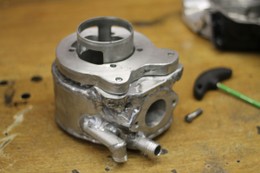
I took care to solder the wires as close to the damage as possible, in order to avoid needlessly burning off any protective chrome plating on undamaged surfaces. I polarized the weld, so as to direct the flow of electrons from the more massive side towards the thinner one

Weld_2.jpg Weld.jpg
 
Last edited:

Grug Arius

Phorus Primus
Staff member
I cant tell what you hav going on there. Looks like an eggbeater clamped in a flaring tool, with a buncha wire goin I cant tell where but somewhere theres what looks like a switch and a 5v regulator and a couple clamps

Whatsit do?
 

Gawn Chippin

Arachnocronymic Metaphoron
That transistor that's hanging there is hooked up parallel and plays no role, given that electricity's lazy enough to take the shortest path possible. The switch was not harvested from an oardinary electric drill. But from a drilling device powered by an accumulator.
The clamps hook up to an oardinary automobile battery. One wire connects the clamp directly to the beater, while the other connects to the other clamp, having the switch soldered in between it and the other part of the beater. It functions as a sort of spot welder in much slower motion than expected.
After having inspected the weld, late yesturdday, I noticed that a gap was left, because one of the beaters four bits didn't break off in a straight line. Later on, I will try sizzling the assembly once more, in an attempt to have it fully weld across this gap, before disconnecting the wires. If I can set it up, I'll attempt capturing the oardeal on video
 
Last edited:

Gawn Chippin

Arachnocronymic Metaphoron
Yessir. Just a while ago, I attempted continuing the spot, polarizing the connection in the opposite direction. Which now makes moar sense.
It seems, the switch didn't want to KKKo-operate. I then lynched it, as it was smelling burnt.
I have found a more robust switch of which operates when I squeeze the trigger. The previous one operated when I let it go. I still will be carefull, not knowing if the next switch will convey more amperage than expected oar not. Perhaps, I should go find a relay?:

Gapp_Crapp.jpg

Here are views of the gap:

Gapp_2.jpgGapp.jpg
...a buncha wire goin I cant tell where...
Gapp_3.jpg
 

Gawn Chippin

Arachnocronymic Metaphoron
So as to not waste the next trigger, I will hook it up to connecting a low-amperage primary circuit of a starter motor solenoid from a 50 cc Honda scooter

SolenOId.jpg
 

Grug Arius

Phorus Primus
Staff member
You hav been a phoron for all these years and I never gnu until recently that we are both gear-heads cut from the same cloth

I am sure u hav probably seen where people use microwave oven transformers, removing windings from the hi-voltage side of the transformer and rewinding it with heavy gage cable to make a spot welder

Seems like a worthy project

Anyway, the only concern I hav with your ad-hoc and very basic DC welder would be with contamination of the weld with oxygen

Let it be known tho that I hav never welded stainless steel and I dunno what other additional problem this mite present other than toxic heavy metal fumes

I think your setup would work better with two batterias in series of 24v but I am sure u already gno this

In the old Ford I had two batterias that I could reconfigure to make a 24v DC welder for quick offroad repairs but I hav since removed one of the batterias as it died and I am too dam pore to justify replacing it
 

Gawn Chippin

Arachnocronymic Metaphoron
You hav been a phoron for all these years and I never gnu until recently that we are both gear-heads cut from the same cloth
As I walk by people on the street, I sometimes wonder if they have the same political affiliations as I.
As of fairly recent, I have been fascinated with upcycling. Especially, after we have been flooded with slip-shod imports, during the last few decades
I am sure u hav probably seen where people use microwave oven transformers, removing windings from the hi-voltage side of the transformer and rewinding it with heavy gage cable to make a spot welder
Not yet. But that reads like quite a usefull suggestion. I'm sure, there are videos available concerning. What I did indeed see is the malicious conversion of the microwave unit's magnetron (L):

Mikrowelle_Verwertung_zps9b377318.jpg


...for directing microwaves through building walls, aiming them at contemptable neighbors of whom fall ill with symptoms inclusive of nausea, as they become slowly cooked
the only concern I hav with your ad-hoc and very basic DC welder would be with contamination of the weld with oxygen
Indeed, during welding with MIG wire. In which case, inert gases (mostly argon) are used. Doing this long-term would require distributing such oxygen-displacing gases on a permanent schedule. However, I've never heard of this preventative measure used in spotwelding. All of this egg beater stuff is still experimental, waiting to be perfected
I think your setup would work better with two batterias in series of 24v but I am sure u already gno this
That would definitely increase the electron reserve, between charges. However, I have always understood that welding requires higher amperage. Increasing voltage would understandably reduce amperage. But, why not? This will remain a goal for future experimentation.
Befoar I go ahead and wire the welder up, I found a rescued image of a Miele washmachine programmer plate of which I've replaced two capacitors, instead of purchasing an entire plate against a trade-in. While heating up chip X with a hairdryer, when the drum begins to spin, this proves that the condensors are due to be replaced. After having done so, the machine functions like new, up to this day. The repair was done some 15 or so years ago. Condensors are known for service failure, due to the electrolyte of which evapoar8s out of them, after 20 years:


Miele_Elektronik.JPG

Here, a the tutoarial video demonstrating repair of a mechanical controler:


Howabout we construct our own cellphone jammer?:


Last edited:

Gawn Chippin

Arachnocronymic Metaphoron
This is how far I've gotten, today. It's all make-shift wiring, except where the orange arrow is pointing to the only soldered connection. I've hooked up the positive side directly to the beater, leaving the solenoid to connect the after load side of the circuit. I'm not expecting the solenoid to weld together. So, I've not hooked up any fuse.
What I might do is to surround the to be spotwelded area with soldering paste. Dooing this will, at least, evacuate any oxygen

Egg_Bea.jpg
 

Gawn Chippin

Arachnocronymic Metaphoron
All three videos taken of the attempted weld have been swallowed by ALDI's scamera. While testing, it functioned. After the actual filming though, this gadget declared its own independence, as a member of A.I.. All data probably got swallowed during the few hours of which this piece of work was shut off. I can't wait for the Biden cadministration to wipe that miserable Hell hole off of the map, inclusive of those responsible for allowing the import of such vile junk. Especially those should be fastened far enuff away from the nuke blast, so that they die the slowest possible deaths resulting.
This is one of these strap-on scameras that get tied around trees, in order to film wild animals. In front of it is the beater of which took a step backwards, as the weld broke off and didn't fasten back on again. What it eventually did was to sizzle the plastic holding the two prongs, despite no resistance previously measured between them. I'm assuming that the gap underneath the plastic was so narrow that current decided to flow through there instead:

Chincquecam_3.jpgChincquecam.jpg

Chincquecam_2.jpg

What I'm contemplating doing next is to solder the joint together, despite the warping of the crown because of excessive heat. I will then attempt to cover the soldered joint with some form of plastic, given that the lead in the solder could otherwise contaminate foodstuffs
 
Last edited:

Grug Arius

Phorus Primus
Staff member
I was just thinkin about this today, and was wondering if your leads are too small of gage. Did it cook the insulation?
 

Gawn Chippin

Arachnocronymic Metaphoron
Absolutely not. Althoa, I've noticed some steaming at the soldered leads connecting to where the beater was suppoased to weld together.
Later on, I'll plug the scamera, vis USB, into the PC and see if the videos might still be in there on the main chip
 

Gawn Chippin

Arachnocronymic Metaphoron
In the mean time, I simply wrapped some copper strands around the intersection, much like a Nativeamerikwan wraps rope around the chiseled from flint tomahawk blade for binding it onto a stick and then proceeded to solder it into a lump of which I crimped together while still molten, using a set of miniature waterpump pliers.
I then painted the joint of which may suffice as sealant. I will coat it again, instead of sealing it with melted plastic.
Interesting to note, the soldered wire connecting to the positive-polarized side wasn't fully removed (Image on upper right). I ended up having to file it away. Whereas, the presumably zinc-coated wire strands were relatively easy to disconnect from the assembly. This information may be usefull for those contemplating on using impure copper wire for soldering:

Beat_Kwapper.jpgBeat_Sold_Iron.jpgBeat_Paint.jpg
 
Last edited:

Gawn Chippin

Arachnocronymic Metaphoron
The following coffee grinder is not to throw away yet. I chose to modify it for the intent on prolonging its service life. Thus, not throwing it away so soon.
As I was in the process of extending the power cord, in order to avoid additional extention cord inconvenience, I saw the need for adding its ability to cool down during use, adding 12 millimeter vents as distant from top to bottom as possible, intending on exploiting the velocity stack principle, similar to how the lengthening of smoke stacks evacuate combustion chambers more efficiently:

Kaffemühle_3.jpg

I could fit in a total of 14 (to be shown upon completion):

Kaffemühle_2.jpg

Initially, the darkening of the windings gave the impression of needless overheat. After closer examination, however, this appears to only be carbon residue strewn by the brushes. Nevertheless, I thought it not a bad idea to attempt reducing peak operating temperature:

Kaffemühle.jpg
 
Last edited:

Gawn Chippin

Arachnocronymic Metaphoron
Itz now assembled and functioning. The white-colored button used to cover a switch of which I determined to be somewhat impractical for my needs. Instead, I have replaced it with a switchalike which is actually a retracting spring-actuated button:

Kaffemühle_LOL_Knopf.jpgKaffemühle_LOL.jpgKaffemühle_LOL_2.jpg

I initially was not going to bother with this button, having had the impression that it was a sort of safety option of which prevented the machine from operating without the grounds chamber, until I realized that it was a sort of snap mechanism of which prevented the chamber from releasing without manual movement.
The dial operates the grinding mechanism's dinstance variation adjustment for fine to coarse :

Kaffemühle_LOL_3.jpgKaffemühle_LOL_4.jpg
 
Last edited:

Grug Arius

Phorus Primus
Staff member
during rebuild of hydro pump yesterday I LOST one of the spring seats from the inside of one of the pistons when I was blowin it out with compressed air. no hope of recovery. Cost of new cylinder block assembly- over 200 ZOGbux

BUT.... I had another hydro gear pump layin in salvage bin.. it was a different model but turns out the cylinder blocks are almost identical and so was able to cannibalize it for the needed part (the small disc in the pic)

also, the stupid nylon check-ball (not pictured ) for the charge pump relief valve was all chowdered up, and upgraded to a steel one from the scrap pump

the chowdered check-ball mite explain why that side pump didnt seem to produce as much flow


DONT THROA IT AWAY
 
Last edited:

Gawn Chippin

Arachnocronymic Metaphoron
...I LOST one of the spring seats...
It lost you. It hasn't disappeared. It has to be somewhere.
Beware of where your devices either got manufactured or womanufactured


"We live in a throa away wörld".

 
Last edited:

Gawn Chippin

Arachnocronymic Metaphoron
Whenever I get the opportunuty, I ride by a metal-shredder where people dump their unwanted scrap onto their property. Last week, I found one of these gems of which appear to be a cooling system from what I estimate to be some sort of gasoline-powered two-wheeled vehicle of no moar than 125 ccs. It appears to be in a very good condition and the hoses are even still quite maleable.
This would be perfect for converting over my 3-wheeled pick-up to water cooling of which I had planned, as soon as its present cylinder were to superceed further service life.
All that's missing is the cap. As soon as I can identify its brand, I could then locate a cap for its expansion tank:

LOL_Radiator.jpgLOL_Radiator_4.jpgLOL_Radiator_2.jpg
LOL_Radiator_3.jpg

There's a shop in Italy which specializes in machining blocks to accomodate Rotax liquid-cooled cylinders:

Affe_Rotax_2.jpg

The plumbing explained:


...The mopped coolers available on the market do not really fit nicely. The water inlet and the water outlet, as well as the filler neck, are often in the wrong place...

worb5-vespa-lambretta-16-water-cooling-T5-water-pump.JPG


Dooing ones'self welding of an air-cooled aluminum cylinder will require a new welder:

worb5-vespa-lambretta-08-water-cooling-malossi-MHR.JPG


A candidate for the conversion:


Of coarse, there are less expensive cylinders of these available​
 
Last edited:
Top